JDBC connection from JasperReports Server to Couchbase
• •


Couchbase, a NOSQL BigData database, now offers a new language, N1QL, to write queries. This article will show you how to use the new Couchbase JDBC driver in JasperReports Server (I will use tje JRS acronym from now), in order to execute SQL(92) queries on the Couchbase database.
- Prerequisites
- Folder structure creation
- Add the JDBC driver files in the classpath
- JDBC datasource creation
- Voila
Prerequisites
As for any tutorial, there are needed prerequisites. Here are them for this tuto.
Couchbase Server
First, you need a Couchbase cluster v4.0 or later. As I am writing this text, there is a beta version available on Couchbase’s website. This cluster needs to have at least one node with the Index service and one node with the Query service.
JasperReports Server
Then, you will need a working JRS. The easiest is to download the evaluation version. It has all the commercial features and enables you to test the server for one month from the installation date. This evaluation edition embeds an application server (Tomcat) and a database server (PostgreSQL). So, by accepting all the default choices, the server will be installed with all its prerequisites.
Couchbase JDBC driver
Finally, you need the JDBC driver provided by Couchbase. It is currently not publicly available but you can ask Couchbase for it.
Folder structure creation
We will start by creating a folder structure to place the different elements of this tutorial following the best practices. This part is not mandatory to add Couchbase’s JDBC driver and to create a data source, nevertheless it is better and will be assumed to be executed in other tutorials.
First, we have to login into JRS as jasperadmin with the default password jasperadmin (Best practices strongly discourage to connect as superuser, this account is designed to administrate the JRS instance, at the instance level). jasperadmin is an accound with the administrator role. It is automatically created when an organization is created. In our case, with an evaluation installation, it exists and we will use it to add the data source and make it available to the other users. By default, jasperadmin can read and write everywhere whereas joeuser (the default simple user automatically created) can only write in a single repertoire.
When a user connects to JRS, he goes to his organization’s repository. The repository is like a shared folder, with sub-folders and objects. It is possible to give (or not) permissions on the folders and objects, to named users or to roles (groups).
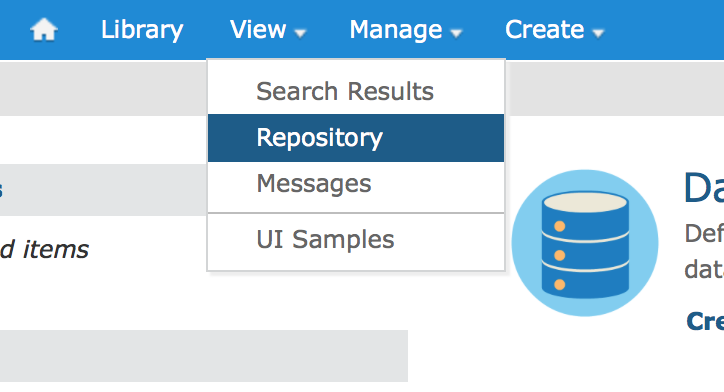
We have to open the repository, by opening the View menu and selecting Repository item :
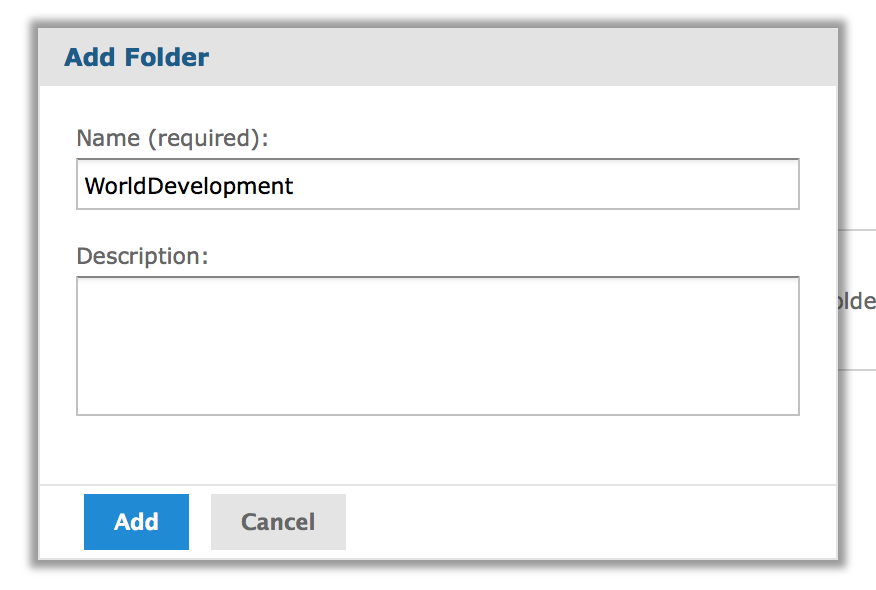
A JRS instance can be available in SaaS. It means that it can accept connections from John Doe/BeautifulFlowers and from John Doe/Flowers for everyone, each of them will only be able to see his company’s data through his company’s report templates (or shared templates), in a customized user interface (colors, logo, layout, …). So, there are private locations for each company (organization) and common shared locations. In the tutorial, we will place the data source in the common area so that every organization will be able to use it. We will begin by creating a project folder in this place : /Public/WorldDevelopment. Right clic on the /Public folder to create a new sub-folder :

Enter the folder’s name WorldDevelopment :
Upon the different items that we will create, there are technical items (data sources, queries, logos, prompts, …) and business items (report templates, reports, views, dashboards, …). The business items depend on the technical items to be displayed. Even if the end-user needs to be able to display the business item list and to execute them, he is definitely not interested in listing the technical items. Theses technical items need to be useable but not listable by the end-user, to keep his user interface clean and business focused. We will create an hidden folder to gather all the technical items : /Public/WorldDevelopment/Resources.

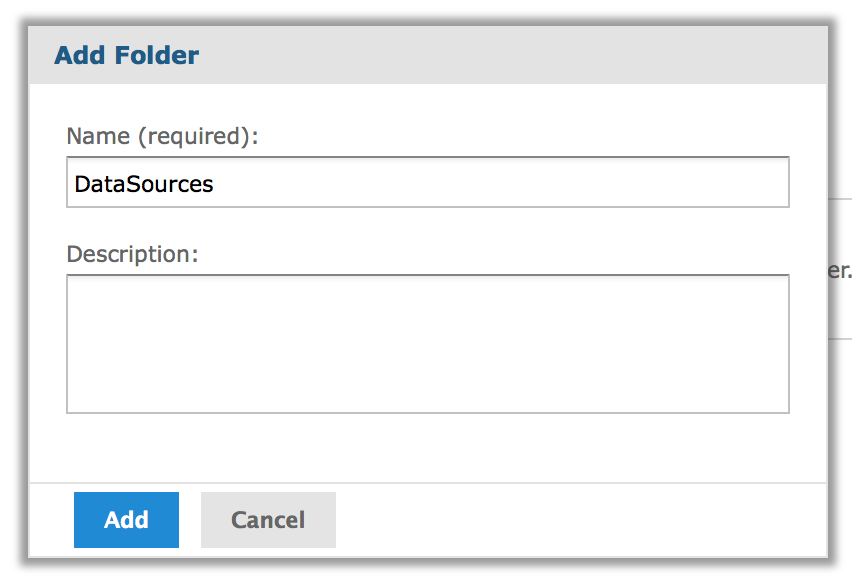
Let’s continue with best practices. We will not create a technical mess with all technical resources together in a single folder. We will place them in sub-folders. In this tutorial, we learn how to create a data source, so we will create a datasource sub-folder in the resources folder, with all the projects items : /Public/WorldDevelopment/Resources/DataSources.
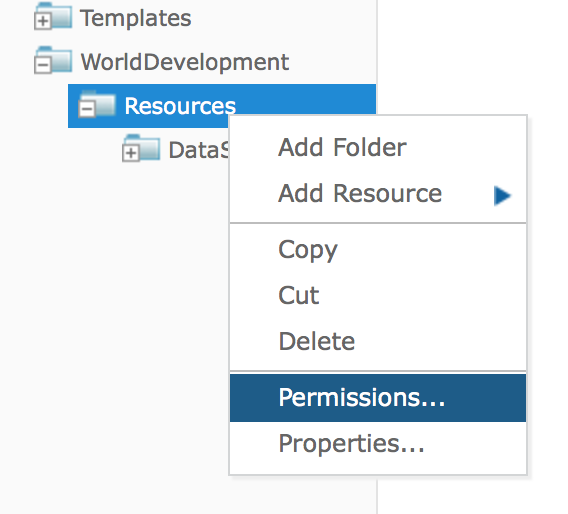
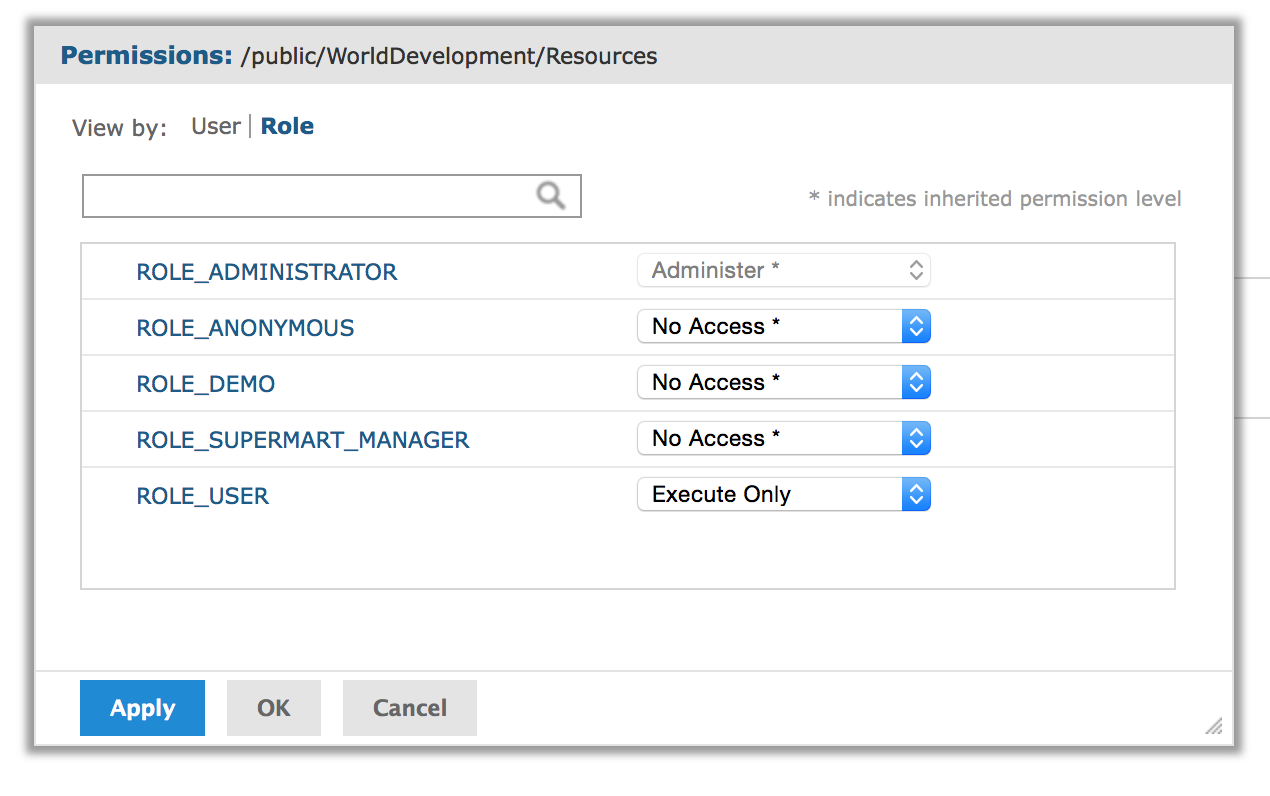
As we will place all the technical items in Resources sub-folders, we will change this common parent folder’s permissions to allow the end-user to use all the included items, but not to list them. Right-clic on the Resources folder and choose Permissions :
Lets give the Execute only permission on the Resources folder to the ROLE_USER role in the dialog :
Congratulation, now, we have a common shared folder structure to all organizations (even if we only have one by default after the installation) with a special folder to hide technical stuffs to end-users.
Add the JDBC driver files in the classpath
By default, Tibco does not provide the Couchbase JDBC driver with JRS. Thus, we need to add it in the JVM classpath. After JRS installation (with the evaluation bundle), Apache Tomcat was installed and setup to execute JRS. It is located in the apache-tomcat sub-folder. The JRS application is located in the apache-tomcat/webapps/jasperserver-pro sub-folder. So, it is possible to add the driver either at the application server level (Tomcat) in the apache-tomcat/lib folder or at the application level in the apache-tomcat/webapps/jasperserver-pro/WEB-INF/lib. I chose to install it at the application server level.
We have to copy all the JDBC driver files (except the PDF one) in the shared libraries folder :
cp SimbaCouchbaseJDBC41_Beta_Update3/*.{jar,lic} /opt/jasperreports-server-6.1.0/apache-tomcat/lib/
Once that the driver’s files are installed, we could directly connect to the web user interface as superuser and manually define our datasource. But there is a more elegant solution : we will tell JRS that we have a new driver and how to use it. It enables us to have a better integration in JRS’s UI and to document the data source creation process for a regular administrator. We will need to add the following XML section in the /opt/jasperreports-server-6.1.0/apache-tomcat/webapps/jasperserver-pro/WEB-INF/applicationContext-webapp.xml configuration file, in the jdbcTibcoConnectionMap section (line 240) :
<entry key="couchbase">
    <util:map>
        <entry key="label" value="Couchbase"/>
        <entry key="jdbcUrl" value="jdbc:couchbase://$[dbHost]:$[dbPort]/$[dbName];UseN1QLMode=1"/>
        <entry key="jdbcDriverClass" value="com.simba.couchbase.jdbc41.Driver"/>
        <entry key="defaultValues">
            <util:map>
                <entry key="dbHost" value="localhost"/>
                <entry key="dbPort" value="8093"/>
                <entry key="dbName" value="default"/>
            </util:map>
        </entry>
    </util:map>
</entry>
Then, we need to restart Tomcat. Even if it would be possible to restart tomcat only, we will use the bundled global script to restart both Tomcat and PostGreSQL within an evaluation installation :
cd jasperreports-server-6.1.0
./ctlscript.sh restart
Congratulation, now the driver is available in JRS.
JDBC datasource creation
Now, we can create the JDBC datasource by using the Couchbase driver to enable connections from JRS to Couchbase and SQL(92) queries executions on this NOSQL database.
We first have to connect to JRS as jasperadmin with the password jasperadmin. Then we have to go in the /Public/WorldDevelopment/Resources/DataSources folder, right-clic on its name and choose New/Datasource :
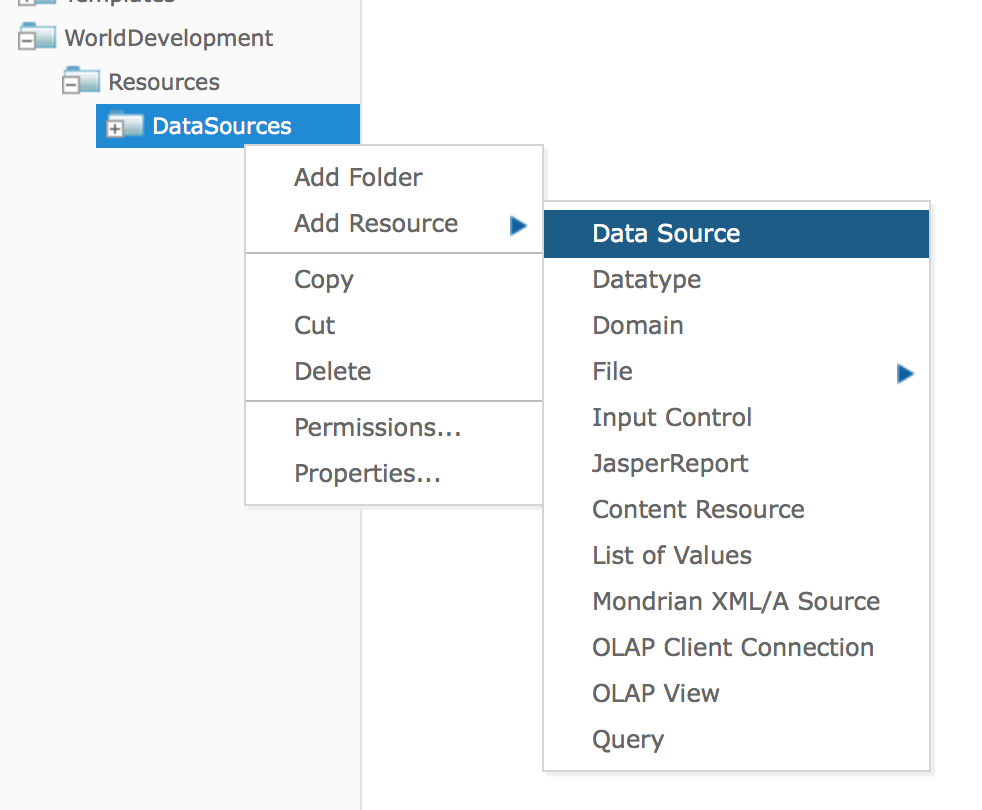
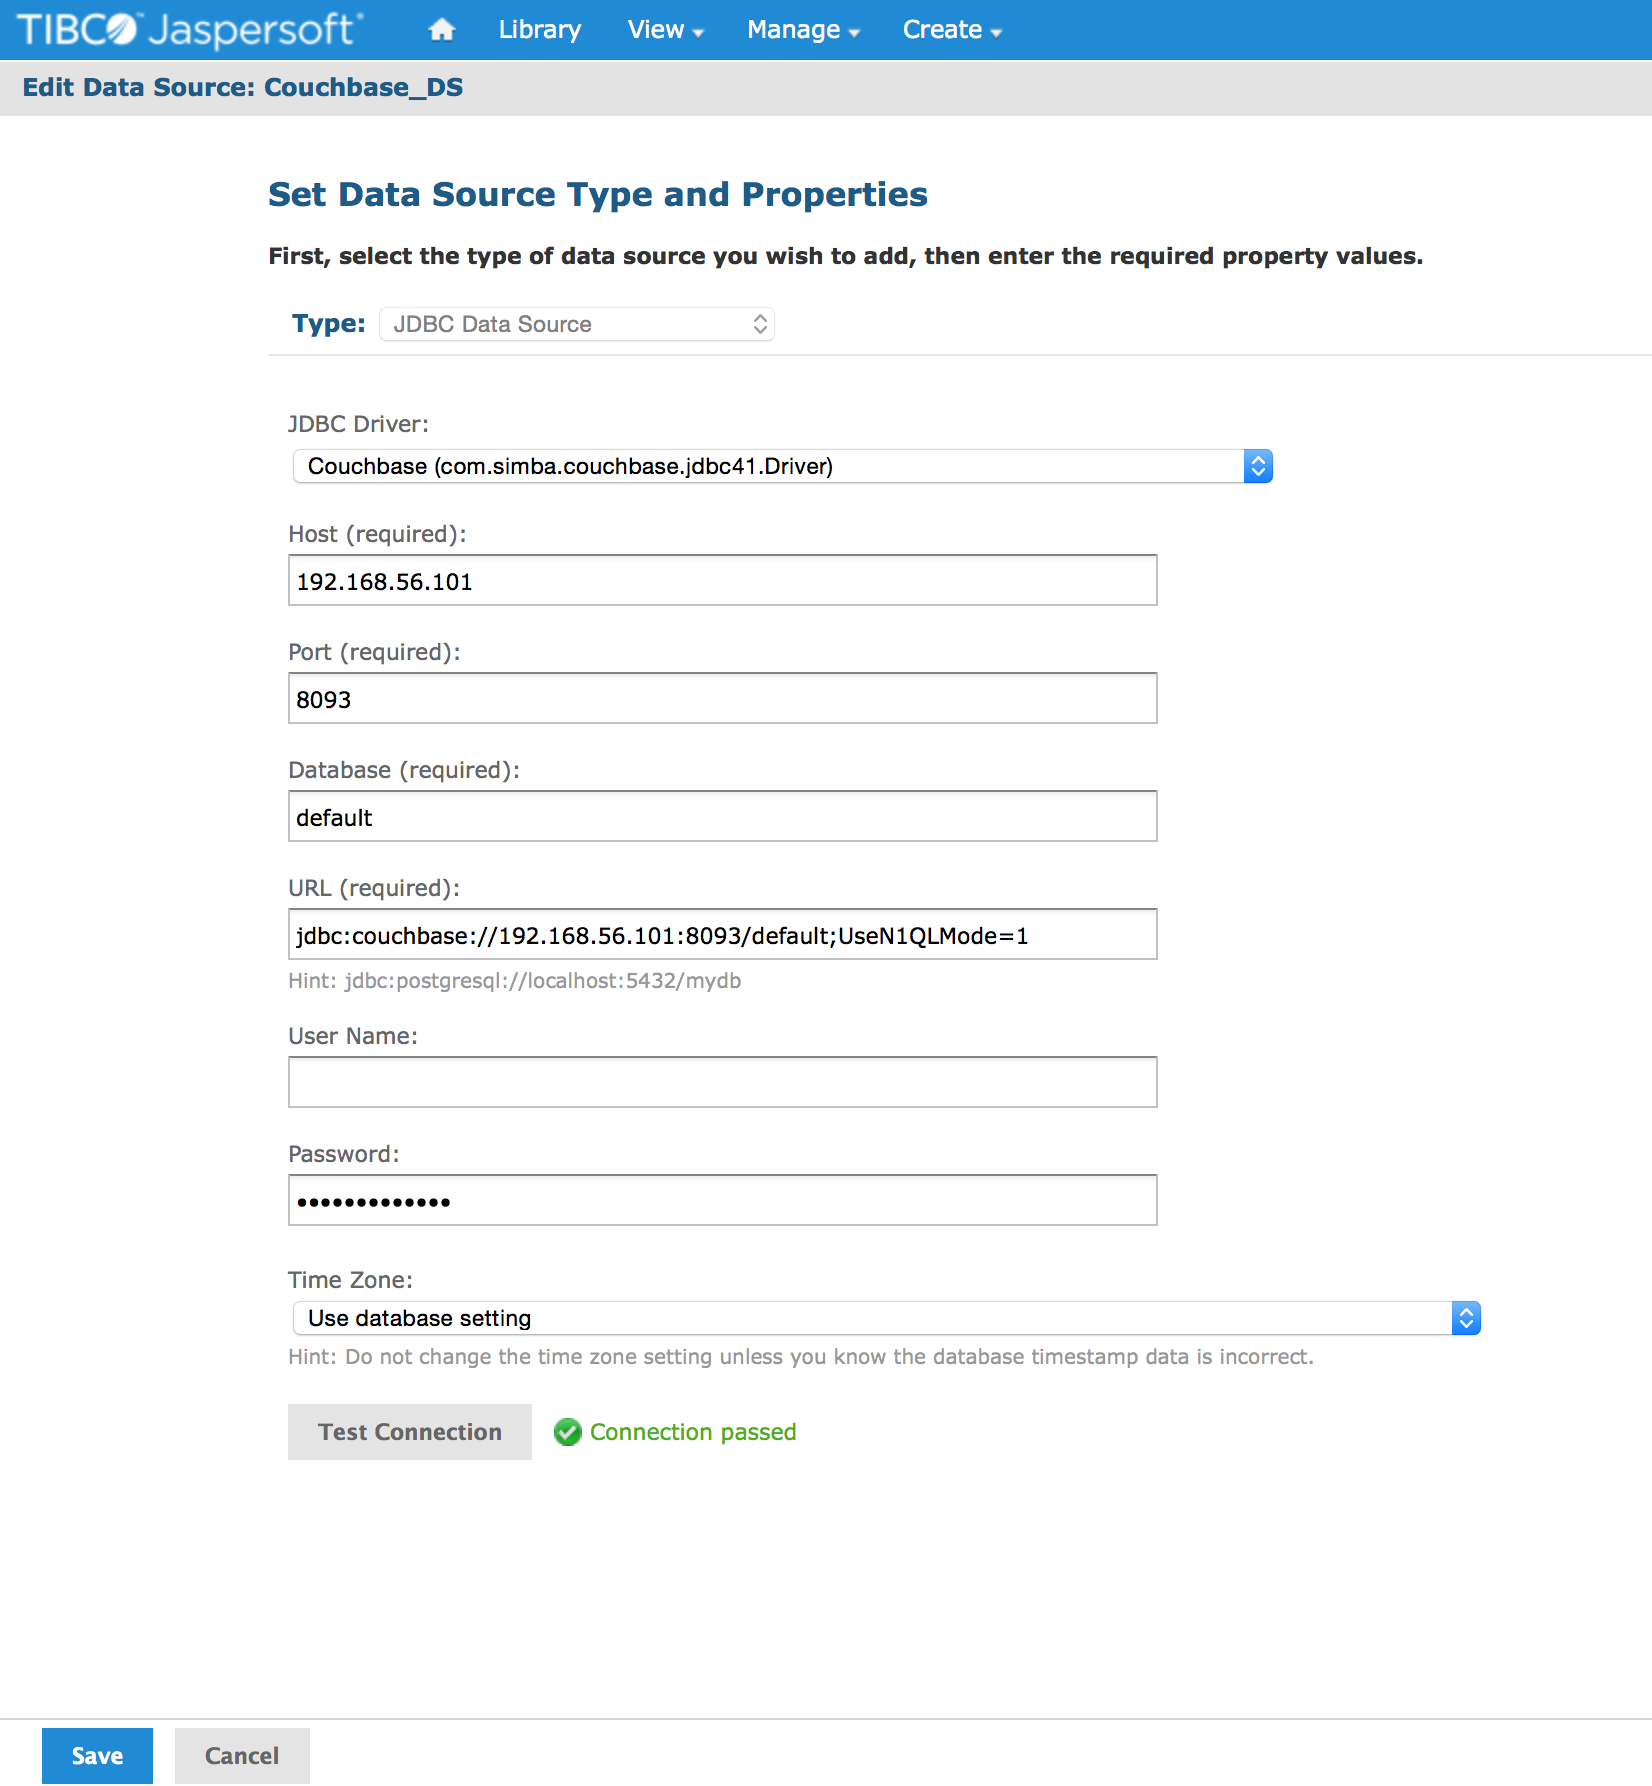
Select JDBC datasource, then choose Couchbase. Thanks to the configuration file modification made earlier, the driver is already known by JRS and we only have to choose it. JRS already know the JAVA class name to load and the default values in the different fields. We only have to eventually replace localhost in the connection URL by one of the Couchbase cluster node and to validate the informations by a clic on the Test button :
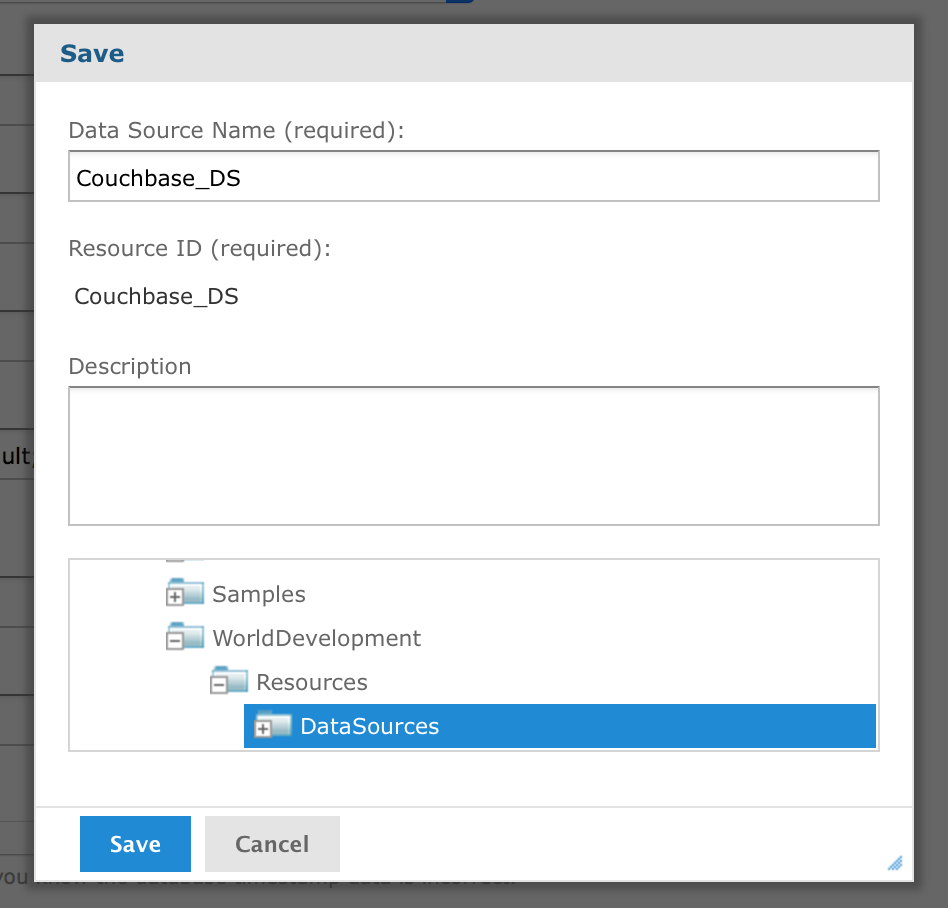
The last step is to give a name to this newly created data source, I chose Couchbase_DS :
Voila
You now have a JDBC connection to your Couchbase cluster. You can use it to execute N1QL (SQL92) queries on the Couchbase cluster. You obviously need a bucket to store documents, with primary and secondary indexes. But this will be covered in another tutorial.